Composting is a great way to reduce household waste, and it’s one of the first things we recommend to those getting started on their plastic free journey.
Why start with composting? Because watching things breakdown and turn back into soil is not only fun but fascinating! When you start composting you quickly learn what does and doesn’t break down, and what items disappear back to nature quicker than others. Some of these items will be obvious, however some may surprise you — like when a skeleton of a tea bag is left behind in a worm farm. Why didn’t the worms eat the whole thing? One word. Plastic.
By reducing the amount of waste you send to landfill every week, you'll be reducing greenhouse gas emissions. When organic material breaks down in an anaerobic landfill environment, methane gas is generated. In contrast the by-product of aerobic composting is carbon dioxide, which is not only less harmful to the atmosphere, it also helps to regenerate soil with healthy nutrients and reduces landfill costs. It’s a win-win.
You’ll be helping regenerate the earth’s soil, plus those taxes you pay to council every year can go to a better use than garbage collection and landfill!
What is the best way to compost?
When people first begin their composting journey, they have so many questions. What’s the best composting system? How do I collect scraps? What can I add to compost? Do I need a lot of room? As many questions as there are surrounding composting, there are an equal amount of answers. Often the answer is “it depends”.
Composting is very simple. Instead of asking “What’s the best way to compost?” the question should be “What’s the best composting method for where I live?” The truth is — there is always a way, it’s a matter of what’s going to work best for where you live and what’s going to fit best into your lifestyle.
In this blog post we’ll look at the options available for those who are a little more restricted with their options: apartment living, no yard space or small outdoor areas.
COMPOSTING USING A WORM FARM

One of the best ways to compost when you have limited space is to use a worm compost, sometimes known as a worm farm.
Worm farms are comprised of three tiered trays. Worms begin on the top tray working their way through the organic waste. They move down into the second tray where they rest, digest and poo. When the second tray is full of castings (worm poo) the trays are rotated.
Once a worm farm is established the resulting compost from the bottom tray is removed and the tray is placed into the top position where the waste is placed.
The first tray is moved down one row and the second tray, containing mostly castings will be moved to the bottom tray. The worms will make their way back up to the top and middle trays to eat rest and repeat.
Once established the worm farm is on continual rotation. Bottom tray is where you collect your compost and top tray is where you add your food scraps. There is also a drip tray or tap at the bottom where you collect any excess liquid. The excess liquid can be safely discarded down your kitchen drain.
Worm trays are relatively low maintenance and are great to use with kids — they are educational and the kids will love being “worm farmers.”
Worm farms are not the most suitable method to use in hot, tropical climates.
“Worms can eat their own weight in food every day!
What can you place in your worm farm?
- Fruit & vegie scraps
- Bread & cheese
- Cooked vegetables, grains, pasta & rice – basically all vegetarian foods
- Coffee grounds & tea leaves (note most tea bags contain plastic, check first before adding).
- Egg shells — a great source of calcium, a mineral which worms require in their diet to stay healthy. (Finely crush prior to adding)
- Newspaper & thin unprinted cardboard – no glossy printed pages
What items don’t work well in worm farms?
- Fish, meat, bones and meat-based sauces
- Large seeds (eg. avocado seeds)
- Citrus fruits, onions, garlic, and chili (acceptable in small amounts)
- Dairy, oils, or grease
- Dog or cat faeces (can be placed in dedicated pet waste only worm farms).
Worm Farm pros:
- Fun and educational — great for teaching young children how to compost (they’ll also love handling the worms, so you don’t have to!)
- Worm farms are relatively maintenance free and fit well in small spaces.
- Worm farms produce beautiful nutrient rich soil that can easily be placed in potted plants or outside in existing garden beds. Know someone that loves to garden? Gift them some worm compost.
Worm Farm cons:
- You’re limited to the amount of food your worms can eat. If you produce a lot of organic food waste your worms may not be able to keep up with consumption.
- In order to capture the compost you will may need to get dirty and touch some worms!
- Worm farms often attract fruit flies.
- Worms are mostly low maintenance and can survive on scraps left in the bin for several weeks. However, if leaving the home for lengthy periods of time you will need to ensure your leachate container (drip tray) is large enough to collect all liquids during this time. Not doing so will result in unpleasant smelling spillage on your kitchen floor!
VERICOMPOSTING WITH SUBPOD
 Subpod is a three-in-one compost system: worm farm, garden seat, compost maker. Subpod works in tandem with nature, using worms and microbes to compost organic waste. It’s odour, vermin, mess and largely maintenance free!
This brilliant Aussie composting invention is now being used in over 20,000 homes across the globe. Although it’s similar in function to a worm composting system, Subpod has the ability to process larger amounts of food waste and contains very little maintenance.
“Subpod is a vermicomposting system – worms and microbes break down food waste and scraps and turn it into rich organic fertiliser.
Unlike worm farms, once established you can add a variety of food waste to the system such as dairy and meats. Subpods can also be used in both hot and cold climates. As the system is buried into the soil, the worms are sheltered underground.
For urban dwellers that have limited outdoor green space, this is a perfect system. Subpod is partly buried in the ground (typically in a raised garden bed). The lid of the composting system keeps vermin out — plus it can be used for seating. The buried section of the Supbod contains small holes in which the worms can move in and out of freely.
What if you don’t have an outdoor garden space? If you have a small concrete patio area, you can construct a raised garden area on top of concrete. Subpod have a video showing exactly how to set-up your compost for this type of situation.
The sleek design, ease of use and low maintenance required makes this a very attractive method of composting.
What can you place in a Subpod?
Once a Subpod is established you can place any compostable items into the system.
- Fruit and veggie scraps
- Fish, meat and bones
- Coffee grounds, tea leaves and crushed eggshells
- Spoiled plant-based milks
- Paper (non-glossy) and cardboard (ink free)
- Cooked grains, pasta & rice
- Meat and plant based sauces
- Coffee grounds & tea leaves (and plastic free tea bags)
- Paper and cardboard
- Natural fibres such as cotton wool balls, toilet paper cores
- Citrus fruits, onions, garlic, and chilli (acceptable in small amounts)
- Dairy, oils, or grease
- Dog or cat faeces (can be placed in dedicated pet waste only Subpod systems).
What can’t you compost in a Subpod?
Like all compost systems you cannot place non-organic materials into a Subpod. These include any form of plastic including plastic clothing, cigarettes, building waste, toxic waste, glass, or silicone.
Subpod pros:
- Sleek design, easy to set up, great for small outdoor spaces
- Top of lid doubles as a seat
- Relatively maintenance free
- Once system is up and running you can add meats, oils and dairy and anything plant based
- Can be placed on an outdoor patio area
- No need to handle worms
- Can be used in hot and cold climates
- Can process large amounts of food waste
Subpod cons:
- Not suitable for indoors
- Requires sufficient space and a raised garden bed to rest in.
- Requires purchase regular of worm mat (although alternative options may be used).
BOKASHI COMPOSTING
 I’ll let you in on a little secret — Bokashi Composting is my preferred method of composting. Why? I call it the lazy gardeners composting method. The process requires very little work. Collect scraps, dig hole, bury waste, wash out bucket — repeat. That’s literally all that’s involved in Bokashi composting.
While this is the perfect scenario for someone that likes low fuss composting, it does have its downsides. Because Bokashi composting requires digging a large hole in which to bury the waste it may not be ideal for people living in apartment buildings.
There are however ways around this. Firstly, you can seek out friends, neighbours or community gardens in your neighbourhood that will allow you to add the Bokashi waste into their dirt. And secondly you can add your Bokashi waste and dirt to a large Rubbermaid container and allow it to compost inside that container (see details below).
NOTE: The Bokashi bucket gets heavy when full, you’ll also need a hose nearby to rinse out the Bokashi bin as soon as possible!
If carrying a large bucket to your intended burial destination is not your ideal way to compost, there is another way. Once the Bokashi bucket is full you can add the waste to a large Rubbermaid bucket half full of dirt. The waste materials get mixed in with the dirt and the lid goes on the Rubbermaid. Once the waste has turned to nutrient rich soil, half of the composted soil can be removed and placed into an outdoor garden space. Or perhaps you could make a little money on the side and sell your soil!
Bokashi pros:
- Very low maintenance, Bokaski is basically a dedicated food waste bin
- Does not require a lot of room (bucket is size of small garbage bin)
- No restrictions to what can be placed in the bucket — both plant based and animal products acceptable
- Can add oils to fermented composting materials before burying
- No need to handle worms or to tend to compost
- Airtight lid, starving fly larvae of oxygen — no surprise maggots in the home!
- Dedicated pet waste Bokashi composting systems available
Bokashi cons:
- Requires using a liquid spray or wheat bran mix that’s packaged in plastic. (You can also purchase Bokashi mix in a compostable hessian bag).
- Requires storage in well ventilated or outdoor area as bucket can give off an acidic, fermenting odour when opened.
- Bokashi is a pre-composting/fermentation stage. The food waste does not “compost” in the bucket. The waste needs to be placed it in soil where the composting takes place.
- Requires two buckets, one for extending fermentation process, other for initial waste collection.
KITCHEN COMPOSTING CADDY

One common question when starting to compost is: what should I store my food waste in?
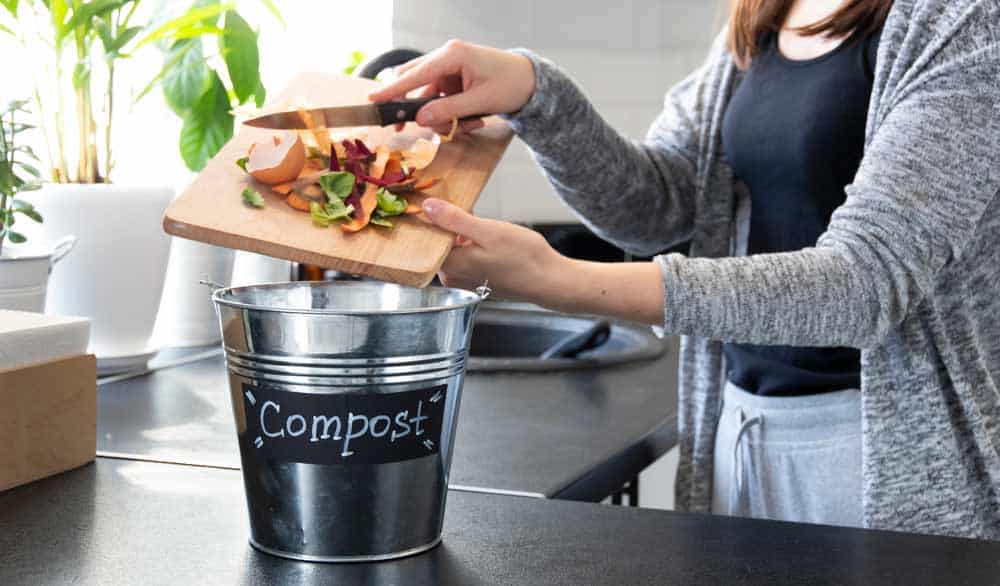
You can put your food scraps into any container — used ice cream bucket, mixing bowl, or a kitchen caddy, however the easiest and most stylish way to collect your food scraps is by using a metal composting bucket.
Continue adding your food scraps to the bucket during the week, once full place the contents into your Subpod or Bokashi Bin. Composting buckets are not needed when using a worm farm as the food scraps can be placed directly into the farm.
Additional options:
- Used plastic yoghurt container or anything with a tight fitting lid.
- Store your bucket in the fridge or freeze scraps (this will help them break down faster)
SHAREWASTE.COM
If you’re not interested in creating compost at home but want to reduce your waste and understand the importance of composting — then ShareWaste may be just what you’re looking for.
ShareWaste.com is a website that aims to give your waste a second chance! The website has a map marked with locations across Australia that will accept your food scraps. It is for both those that would like to accept food scraps and those that would like to donate their scraps to willing participants.
Simply search the map, find a location in your area, and register online. Once registered you’ll be provided with the host details and drop off location. Simply drop off your waste and your host will deal with the rest!
Other options:
- Ask around your neighbourhood to see if anyone has a compost area they are happy to share
- Take your food scraps to your local community garden. They are everywhere —just search “community garden” in Google Maps.
LOMI — ELECTRIC HOME COMPOSTING

The final option on our small spaces, home composting list is probably the most simple and suitable system for small spaces. But it comes at a price — and it’s not yet available on the market. Lomi is a compost system that sits on your countertop. You add the food scraps (and home compostable bioplastics) click the button and wait for your compost to process.
The Lomi composting system is the invention of Canadian company who created Pela — the world’s first compostable plastic phone case.
Lomi pros:
- No actual composting required.
- Does not require a lot of room, can sit neatly on a kitchen counter.
- Can add home compostable plastic
- Lomi is a zero-waste system, should your Lomi break you can send it back to be recycled.
Lomi cons:
- Not yet available, will cost almost $600 with shipping to Australia.
- Requires electricity.
- Restricted to what can be placed in the system (paper, cardboard products and bamboo not acceptable however small bones from chicken and fish are).
- Very small, would not be able to process large amounts of food waste.
- Requires frequent (daily or twice-weekly) cycles.
- Can take up to 20 hours to create compost.
- Not suitable for pet waste.
WHAT’S THE BEST COMPOSTING SYSTEM FOR URBAN DWELLERS?
As you can see there are many ways you can compost in small spaces — far too many to list in this blog post alone but the best method of composting is the one that suits your lifestyle.
Worm farm: The perfect starter system for any composter. While you will be slightly restricted to what you can place in your system, they are small, relatively low maintenance and can process a good amount of scraps for a small family. Low cost to get started (under $200), no additional sprays or compost mixes required. Recommended for apartment living.
Subpod: If you have a small garden area, or an outdoor patio area a Subpod is probably your best option. Subpod may be a little more on the expensive side for the initial purchase (up to $450 for full set-up), however you won’t need any additional supplies, and you won’t be restricted to what can be placed in the Subpod system.
Bokashi: A simple and effective method of composting. Bokashi itself is not really composting but rather “food fermenting”. Once your food is ready to go in the ground it gets buried where the food breaks down and composts — there's nothing else to it! It’s low cost for the initial purchase ($190 for two buckets and two bag mixes), however you will be required to purchase new mix every few months which can cost up to $20 a bag.
Lomi: Lomi system has mixed reviews online. It's definitely not cheap which takes away from the beauty of composting, however if you live in an apartment building or simply don't have the space or time for composting, this type of system would be a fantastic option.

10 things you may not know you can compost!
- Cotton, wool, hemp or linen fabrics (no polyester, nylon, acrylic or blends).
- Untreated pet and human hair and nail clippings
- Human and pet waste (requires specific composting conditions).
- Latex gloves and condoms!
- Charcoal and paper ash
- Masking tape
- Silk dental floss
- Wine corks
- Dryer and vacuum lint (from natural materials only)
- Sawdust


